For our final project for the class Computational Foundations we were allowed to explore any topic we wanted that relates to what we learned through the semester. In every assignment we had that was parametric I had a lot of fun, so I decided to do more of it for my final project. I decided to make parametric rings, as I wear a lot of rings and are always looking for new styles, and wanted to come up with a easy way to test designs on myself before I would buy them. I ended up with 3 separate grasshopper codes that made different ring outputs, the first being a geometric ring, the second being a more organic and curvy ring, and the last being 2 bands connected by stripes. For each of these, there were many parameters I could change to give each ring type multiple outputs, but the one they had in common was band sizing for each ring so you can design the ring to your ring size.

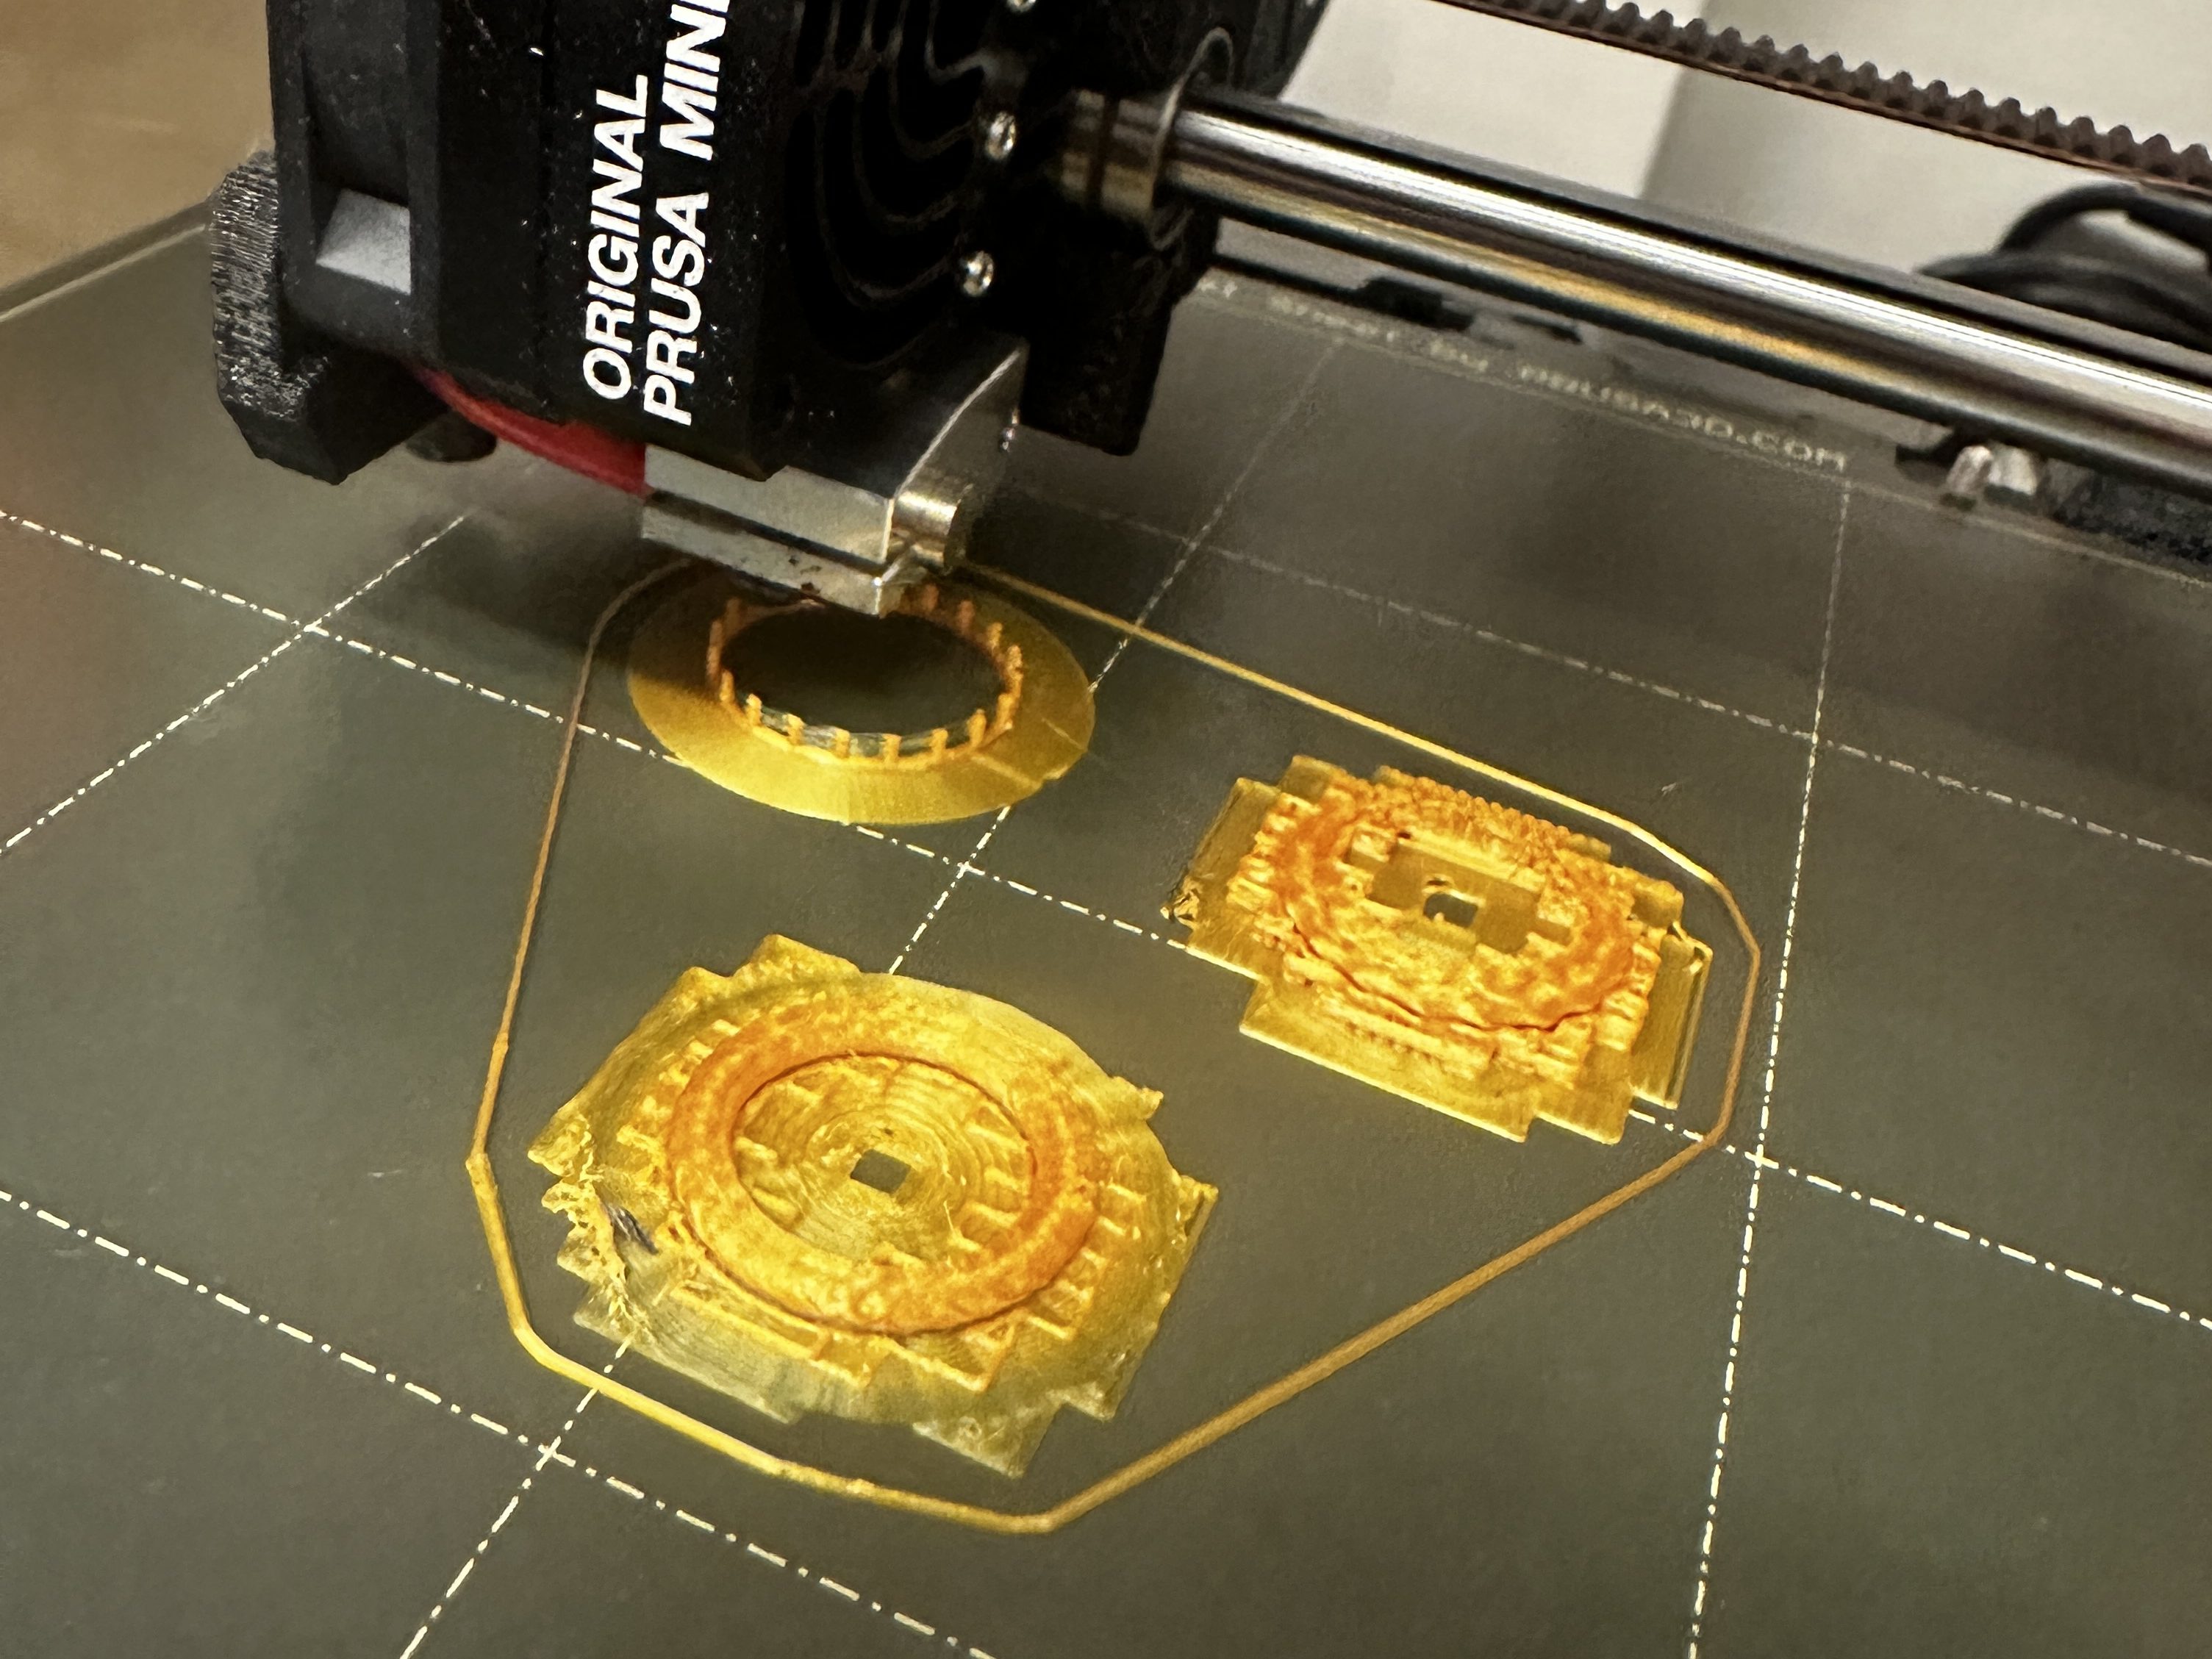
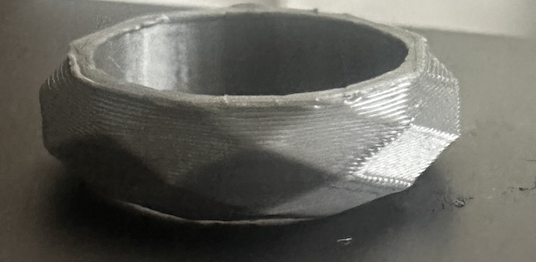
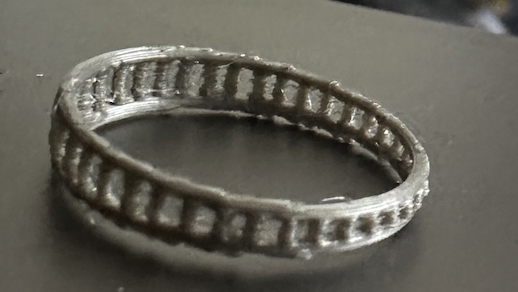
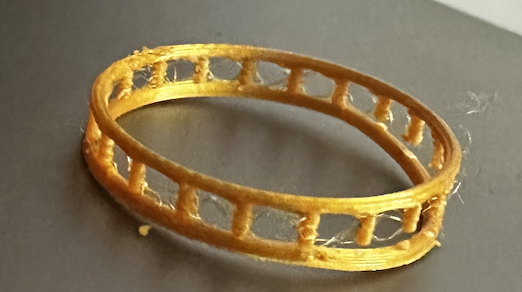
My inspiration from this project came from when I was shopping for rings online and found some I liked but for a lot more money than I was wanting to spend, so I decided that I wanted to try and make a model of it myself to test if I liked it on and if I would actually wear it. I decided to design it parametrically in grasshopper because I had had a lot of experience doing that over this semester. I knew I wanted it to be sizable by ring size, and I knew that I wanted to have a couple different type of ring designs. The other changeable parameters, like the amount of sides in the geometric ring and the amount of spirals in the natural ring, came later as I was coding them. I started each the same way, by making a circle that was the inside band dimension. The geometric ring had an outside polygon, while the other 2 rings had outside circles that I divided into points and then connected to the inside circle. When it came to fabricating them, I chose to 3D print them with metallic filament so they looked a little more legit. Even though I sized them in grasshopper, when I imported them into prusa slicer the sizing got a little messed up so I had to manually re-size them, which caused them all to print at slightly different ring sizes (I imported all as a size 8, which measures 18.2 mm in diameter).
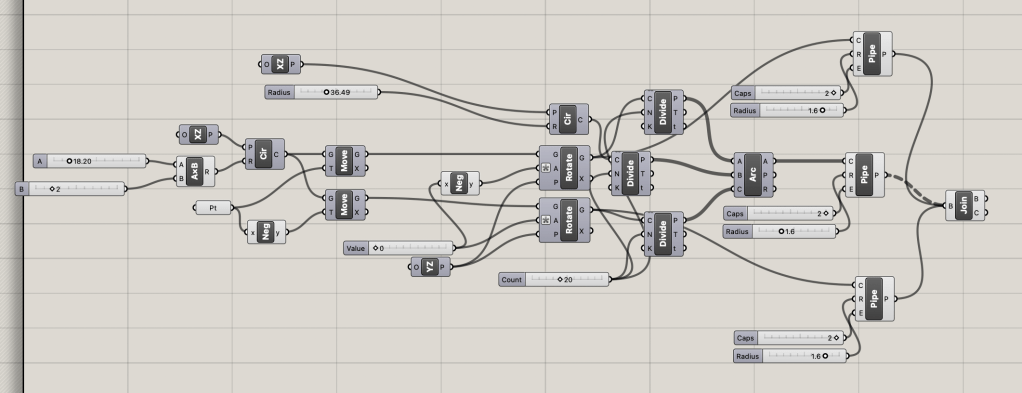
Code and Fabrication
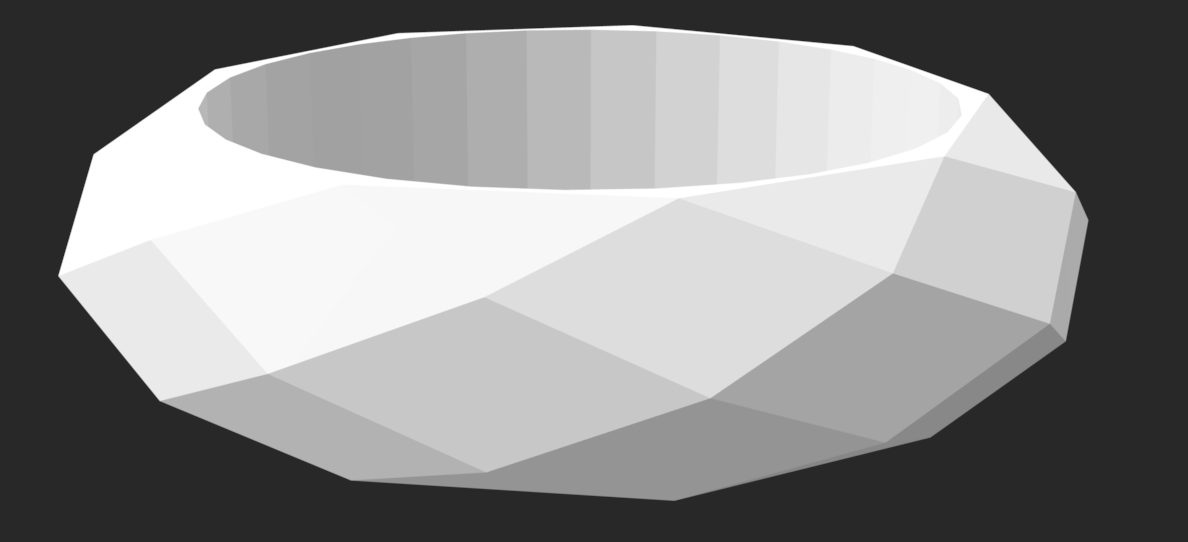
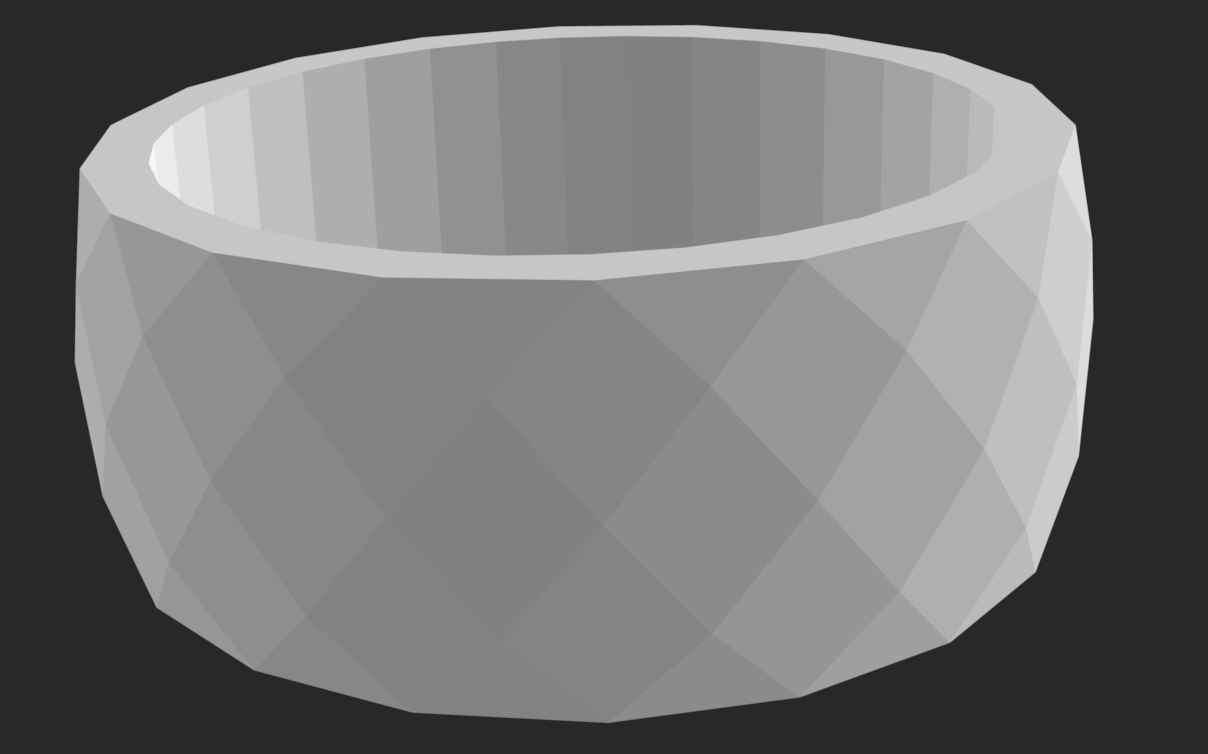
Ring 1 – Geometric Ring
For my first ring, I started by making outside polygons which I split into points, then shifted a couple of the points so I could connect them at angles instead of straight across, which gave the ring more of a geometric look. When I increased the number of points (the number of sides the outside polygons had), it increased the number of shapes in the sides of the ring. I ended up making an inner cylinder that I intersected with the outside polygons to make the inside band.

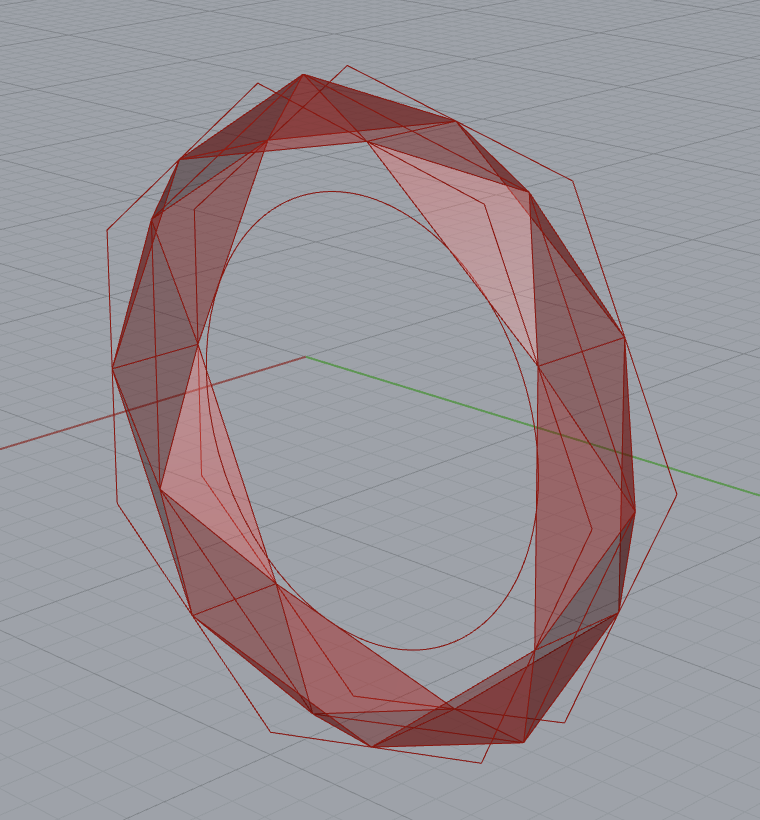

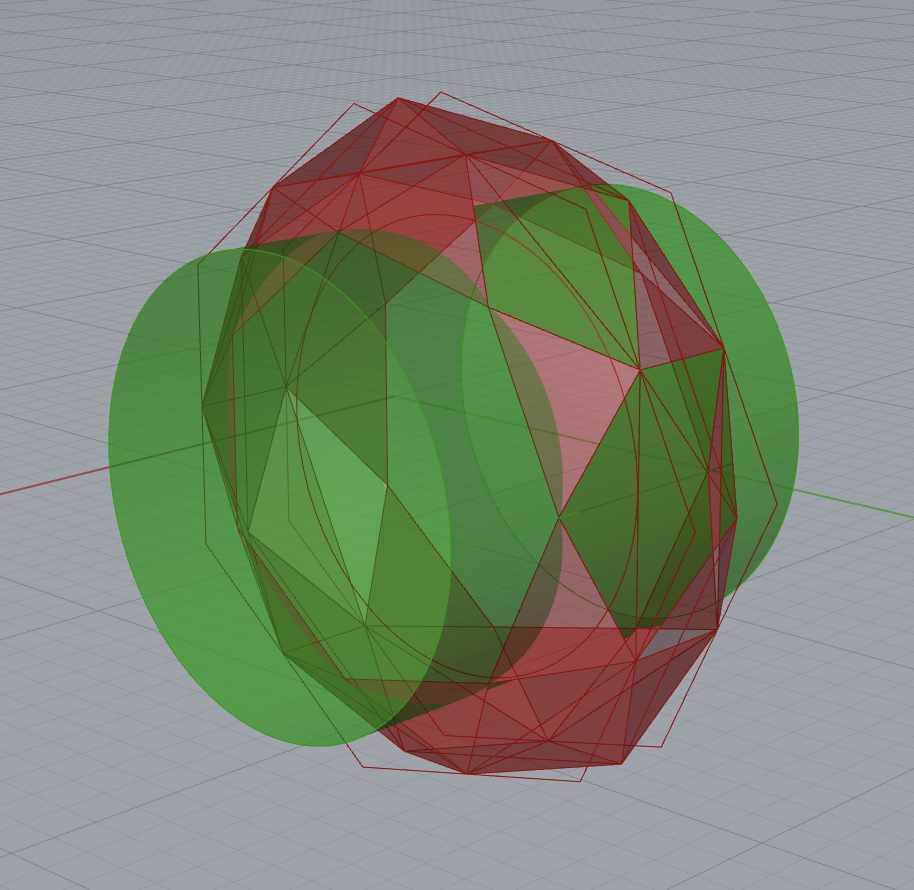
Grasshopper code

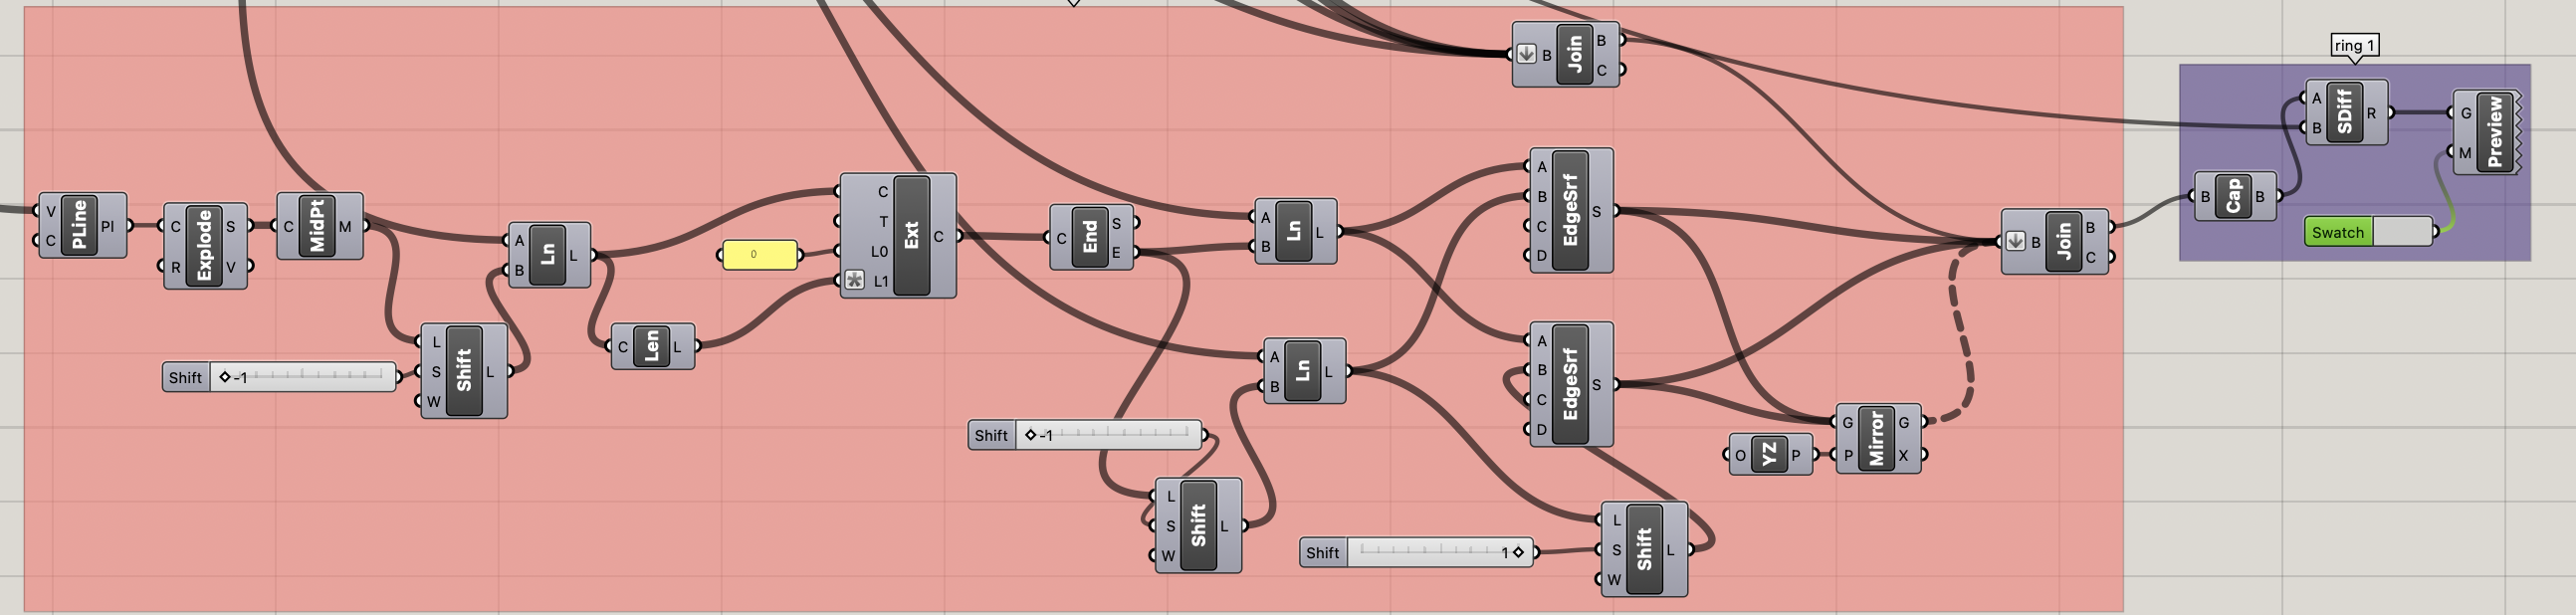
There wasn’t much more to change of this ring than the amount of sides of the polygon, and how wide the ring was. I ended up printing 3 rings from this code, 2 with a higher amount of sides and one with only 5, making it look a little like a screw.
Fabricated Outputs


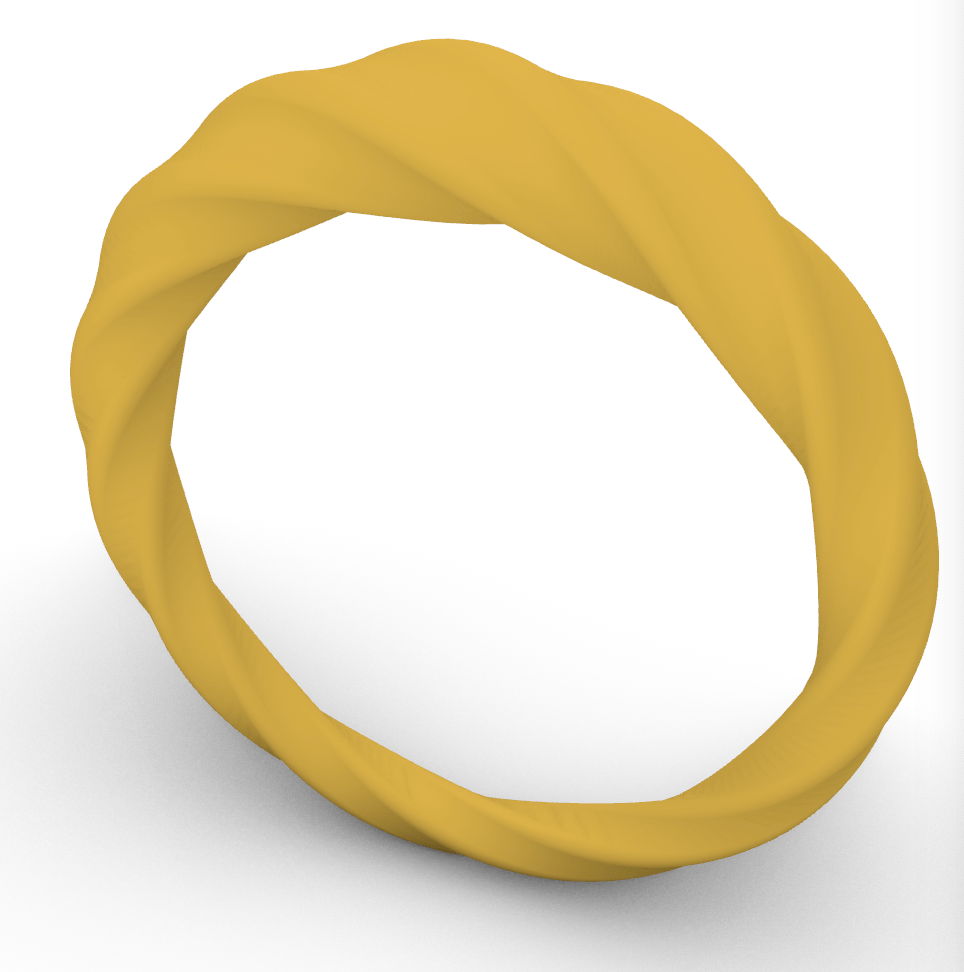
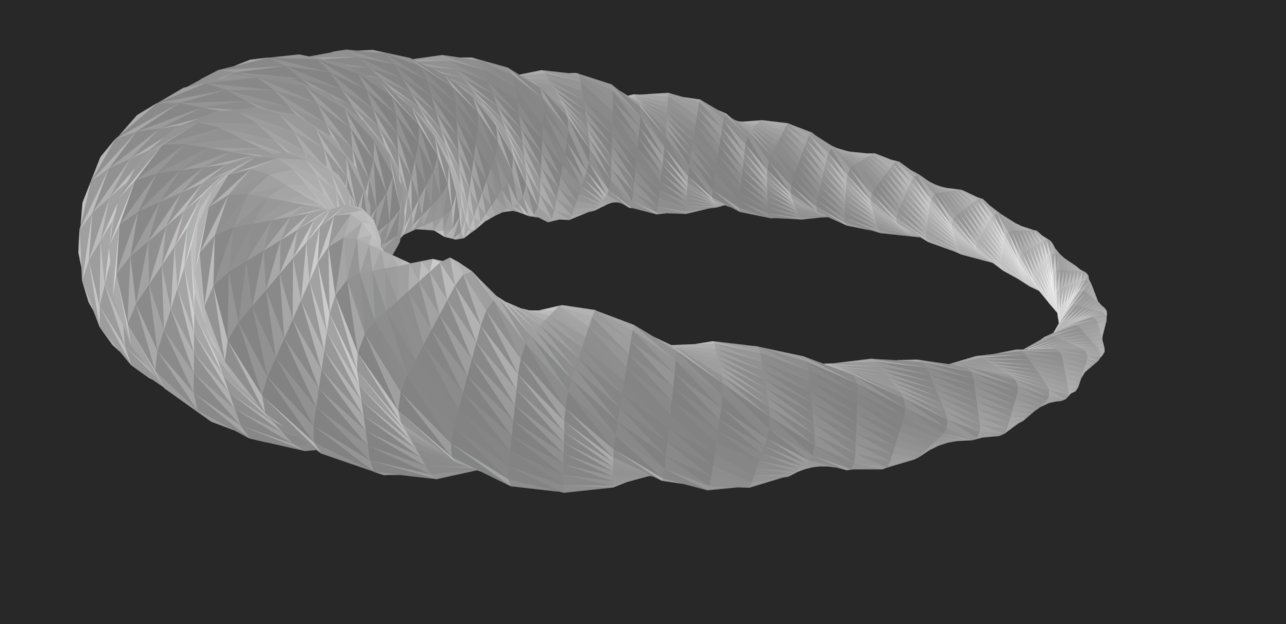
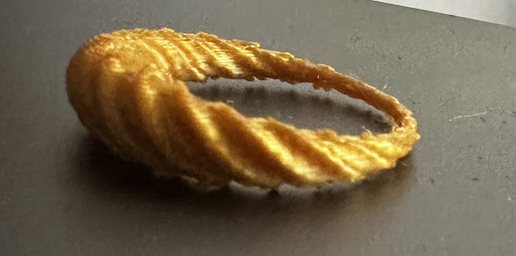
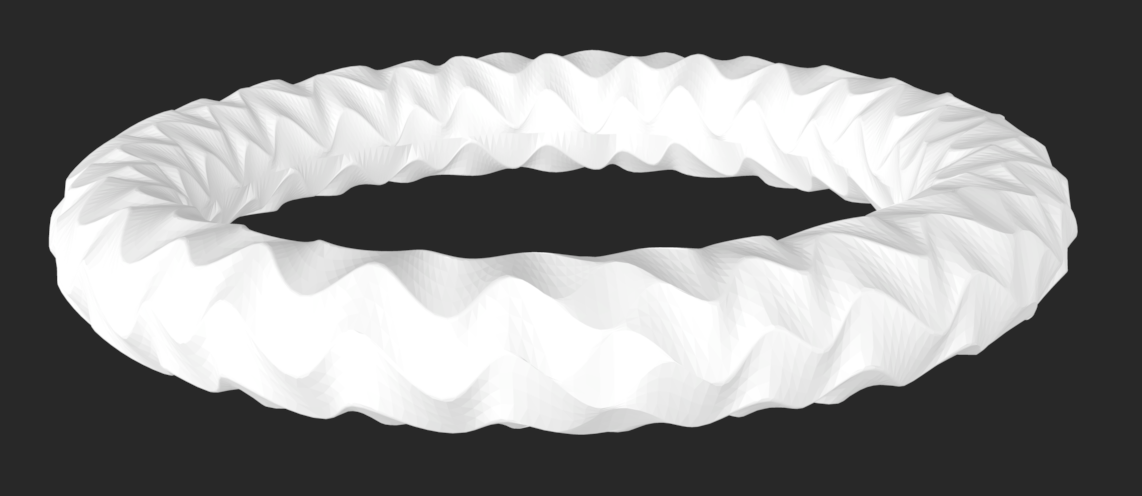
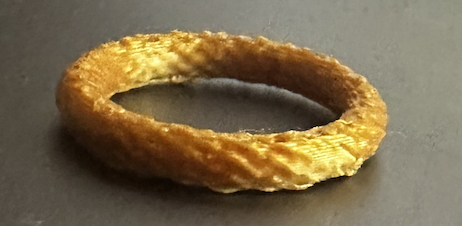
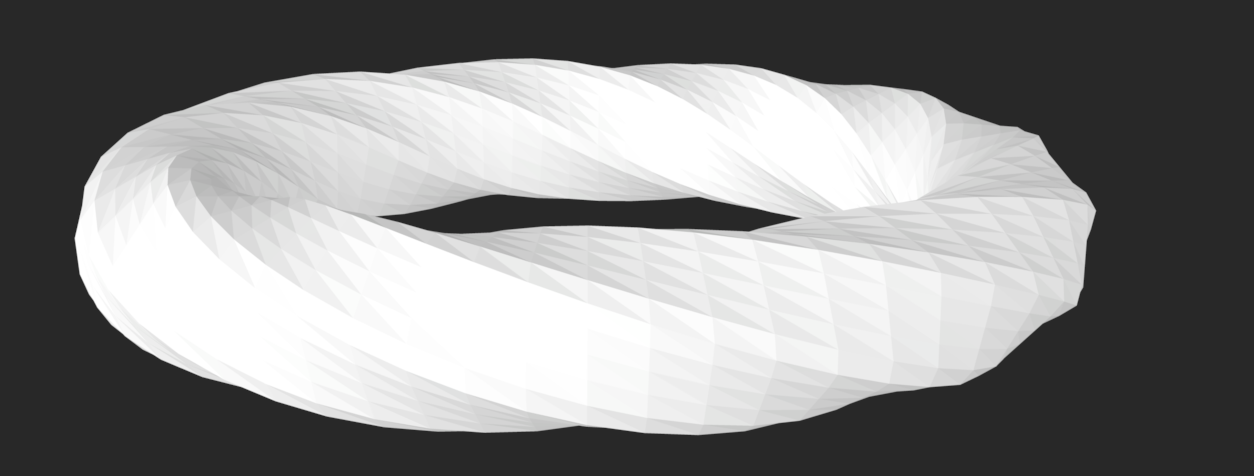
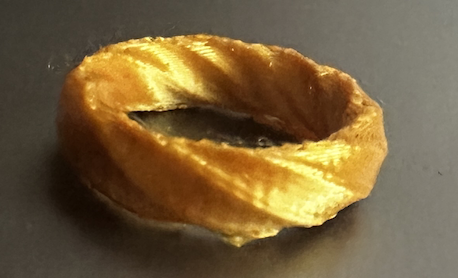
Ring 2 – Natural Ring
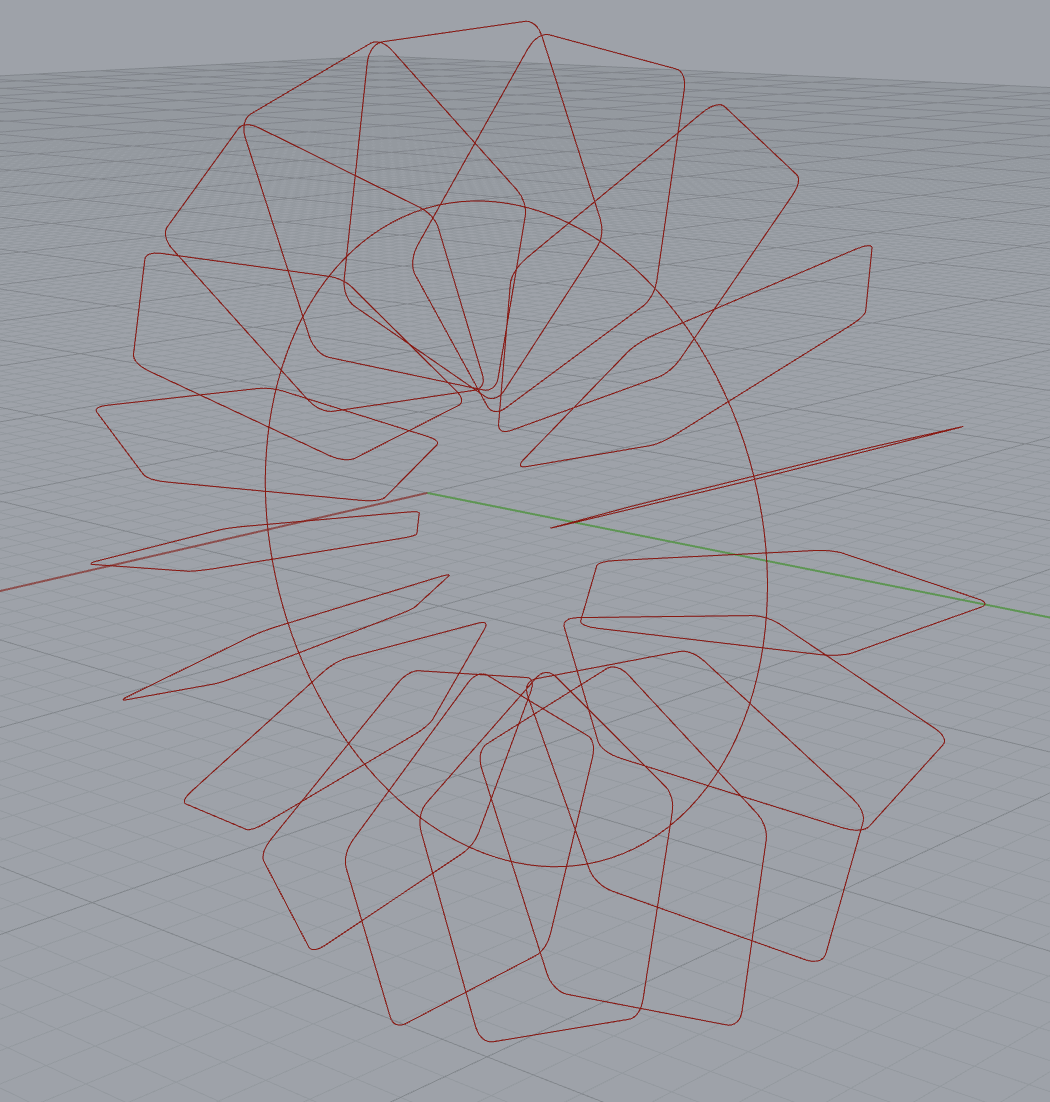
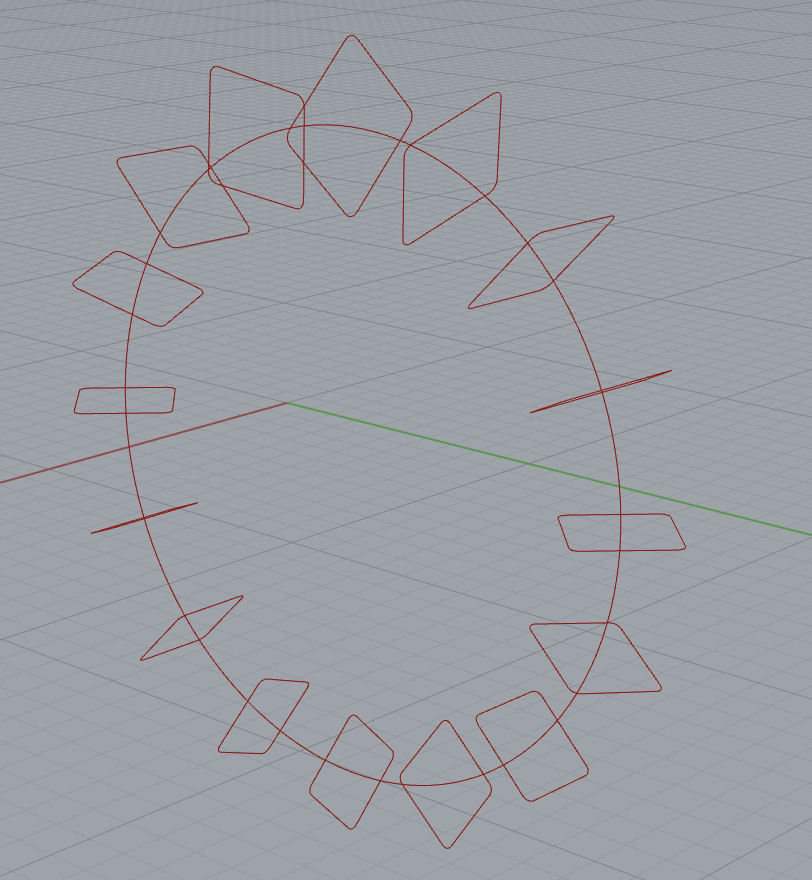
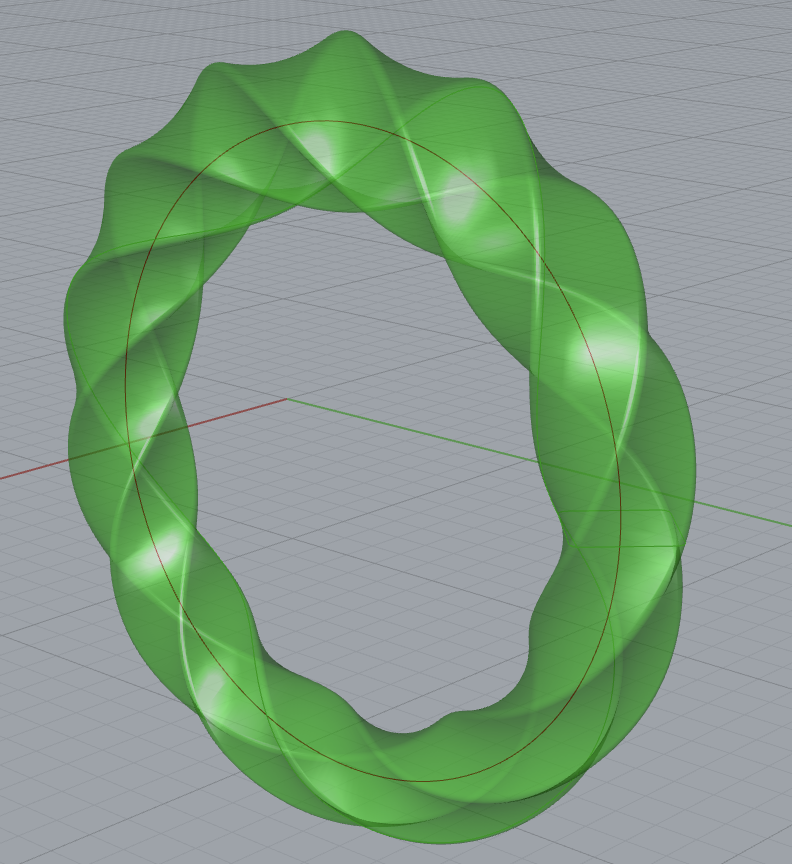
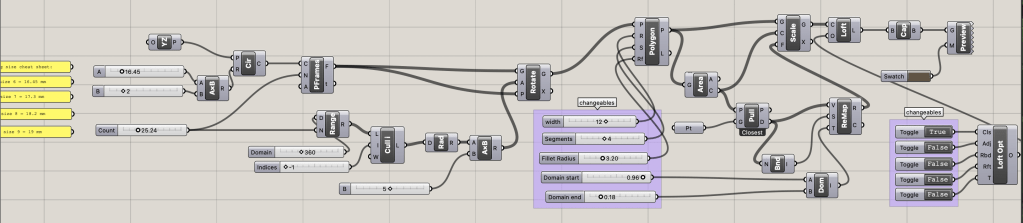
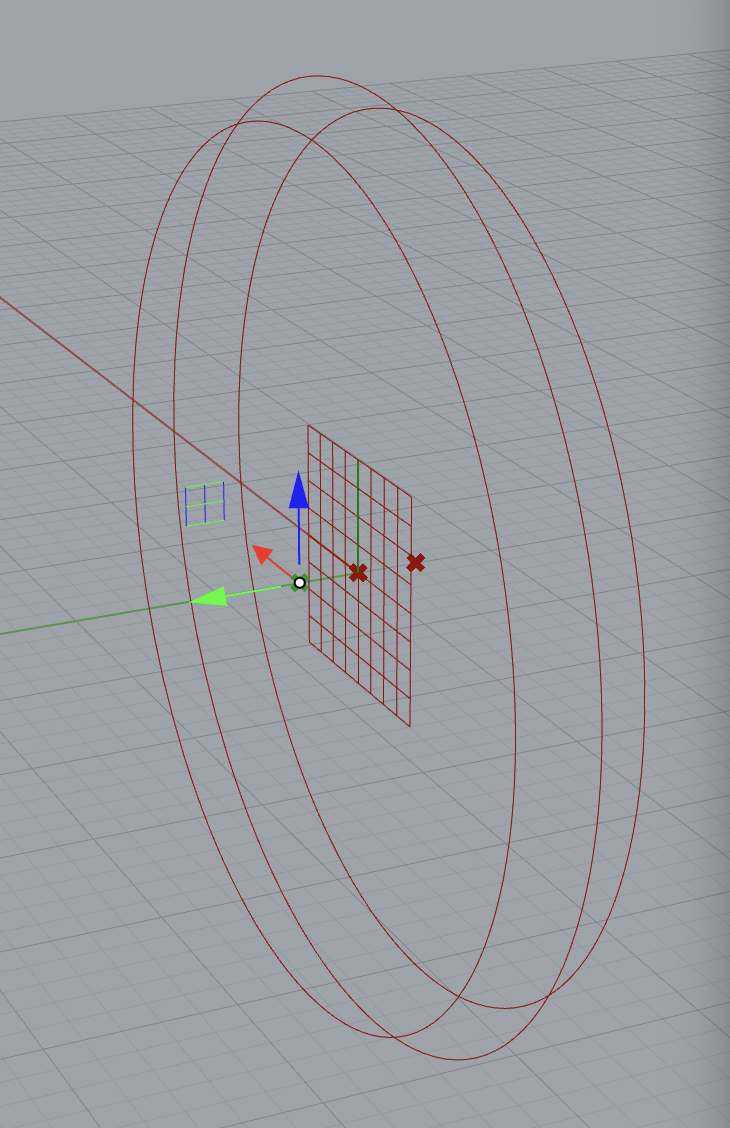
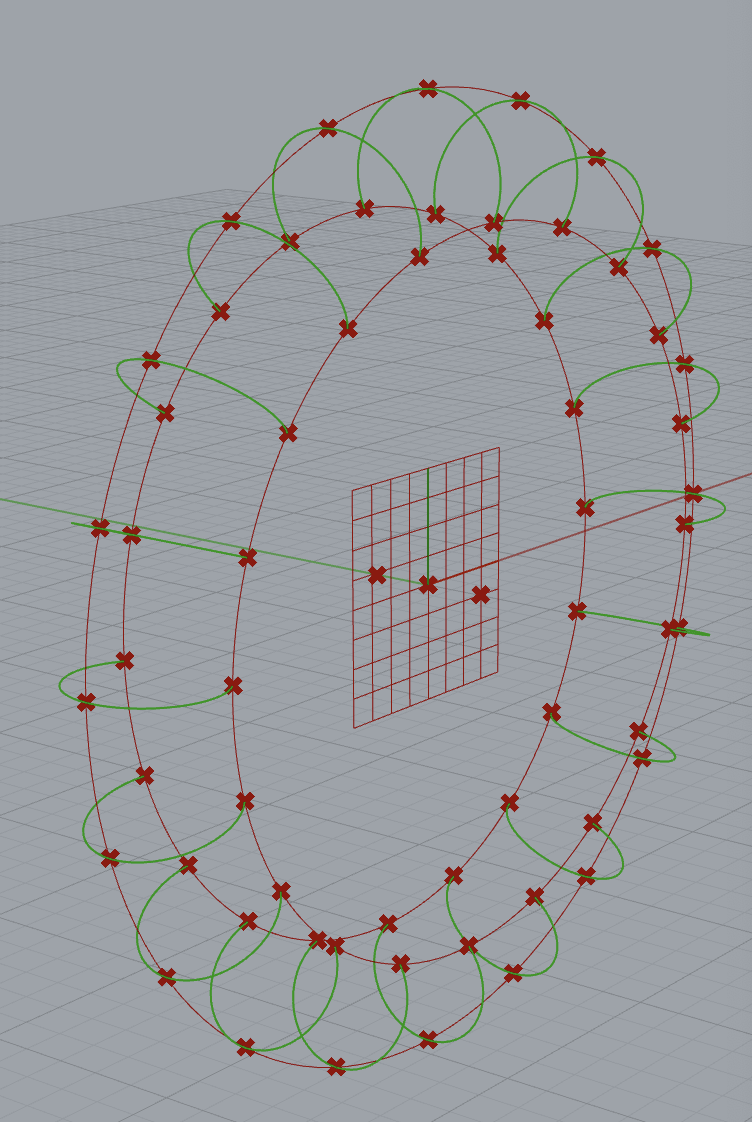
For my second ring, I started by adding polygons around the center band, rotating them as they went around so it would give the ring shape when I lofted them. Since the center circle in between was the sizing I was using, I had to account for that and make the circle a bit bigger to be the true ring size. Along with that, I also had the number of polygons changeable, the width of the ring, including the bottom width and the top width that can be changed apart from each other, and the way the polygons are connected (making the shape more angular or more natural).
Grasshopper Code
For this ring I also had 3 outputs, 2 being more angular and spiral, and the last one being more natural. This was the main ring that I was having trouble sizing because of what I talked about above, the polygon going over the inside circle, so they were a little but smaller than the other rings.
Fabricated Outputs
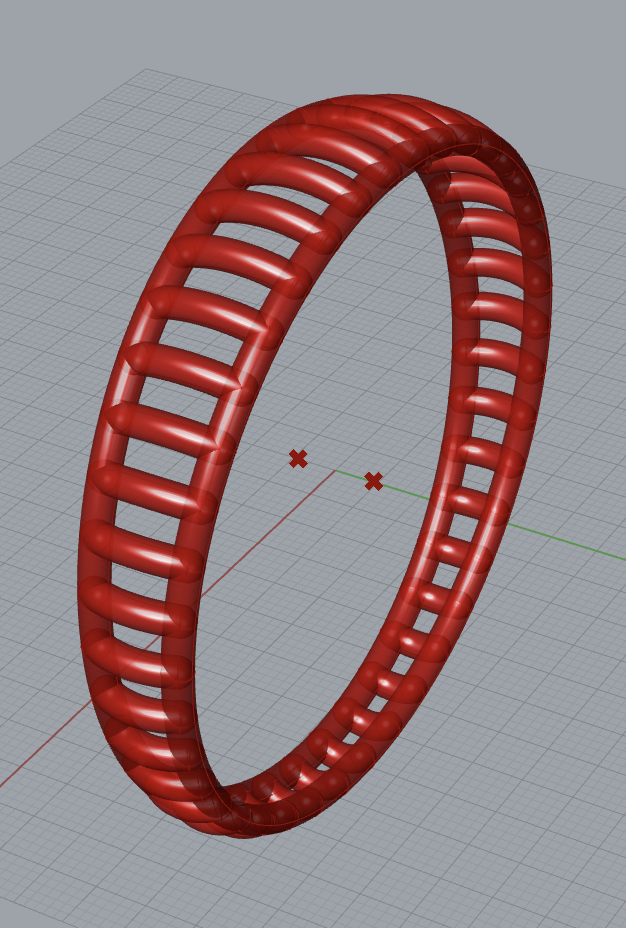
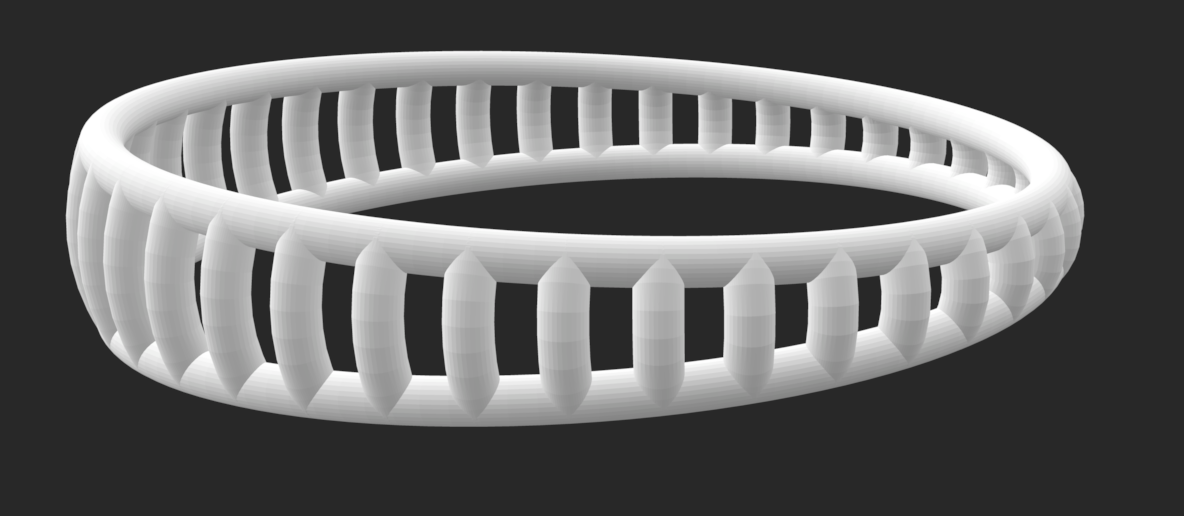
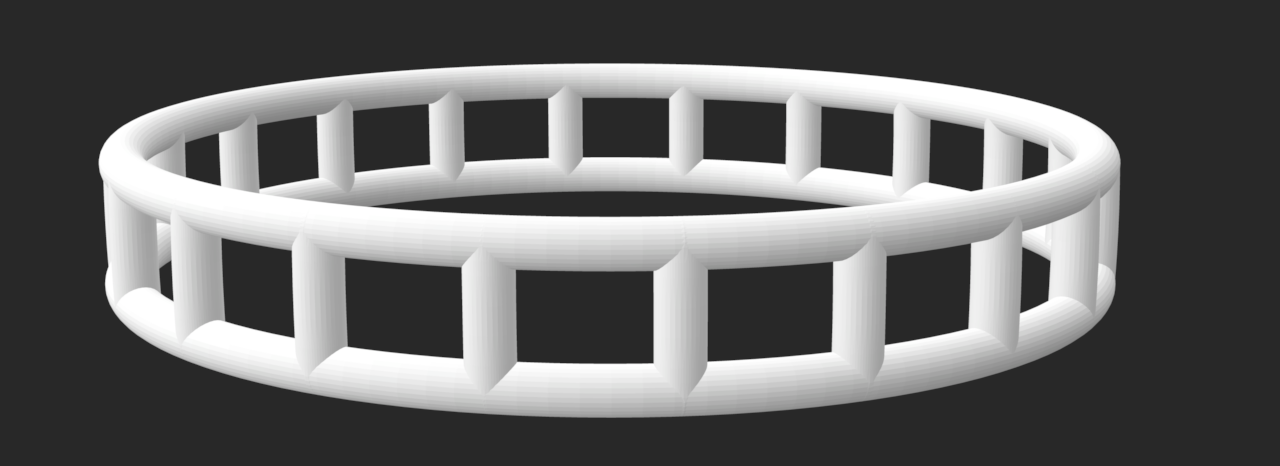
Ring 3 – Bridge Ring
For this last ring, I added two circle slightly smaller than the band size and angled them a bit out so it would create shape between the top and the bottom of the ring, but I also had that be changeable so the ring could be the same width around. I then divided the circle into points and connected them. Based on how big the middle circle was, the connecting lines would be more or less curved. I then used the pipe function to the outside circles and the connecting lines to make it have shape, which could be made larger if a thicker ring was wanted. The number of connecting lines in between was also able to be changed.

Grasshopper Code
For this ring I only created 2 outputs, one of them with slightly less connecting bands, and one that had more of an angle between the bottom and top of the ring.
Fabricated Outputs
Reflection
My project turned out how I wanted it to! I think that each of my different ring codes covers a lot of ring types and that this program will be useful in the future if I wanted to make more rings that I see online. I really enjoyed fabricating it in the metallic filament as I think it added a little realism to the rings that would have been missing if I used a normal color filament. I think that the second ring was my favorite to customize just because it had so many ways to make the ring look unique. I think if I had more time/ worked on improving this in the future, I would expand on my last ring design and make it so the connecting pattern between the two outside bands would either have more random design or could spell out words/ make recognizable shapes like hearts or smiley faces. I am happy though, as now I have a cool program to use in the future, more experience with Rhino and Grasshopper, and a bunch of cool rings to wear around 🙂

Leave a comment